This blog series includes a simple, step-by-step guide on how to move an ASP.Net Application to an Azure PaaS environment. This is the fifth installment of this series. In part one, I went over downloading and running the ASP.Net application’s source code in Visual Studio 2017 or 2019. In part two, I discussed creating an Azure App Services account and setting up resources. In part three, I focused on application deployment. Part four consisted of a discussion on handling configuration changes in the app. In this, part five, I will go over creating and connecting your application to an Azure SQL database.
Step 6: Create SQL Azure Database
Now that your application is running in the cloud, the next step is to connect it to an Azure SQL database. Although this database will be in the cloud, an SQL Server still needs to be provisioned to group and access databases.
To provision an SQL Server, follow these steps:
1. In the left navigation menu, select SQL Servers
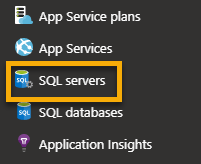
2. A list of currently provisioned services will be displayed. In the navigation menu, select Add.

3. This will present the new logical server creation dialogue. Specify a name for the server, as well as an admin username and password. Select the correct subscription. If you have more than one subscription, place it in the correct resource group and—more importantly—the correct location. Ensure that the “Allow Azure services to access server” box is checked.
4. Click Create.
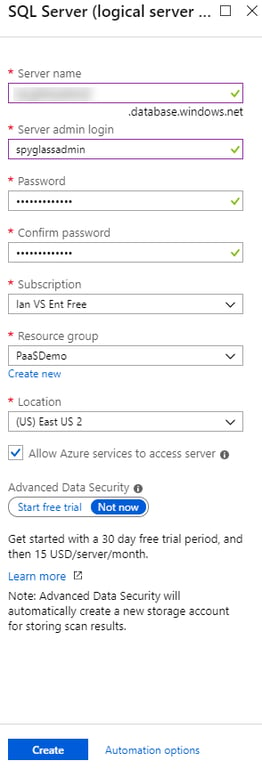
5. You will be redirected to the list of logical services. It may take some time to create the logical server, so refresh the list until your server is displayed. Once it is displayed, click the server name and display the Server Overview blade.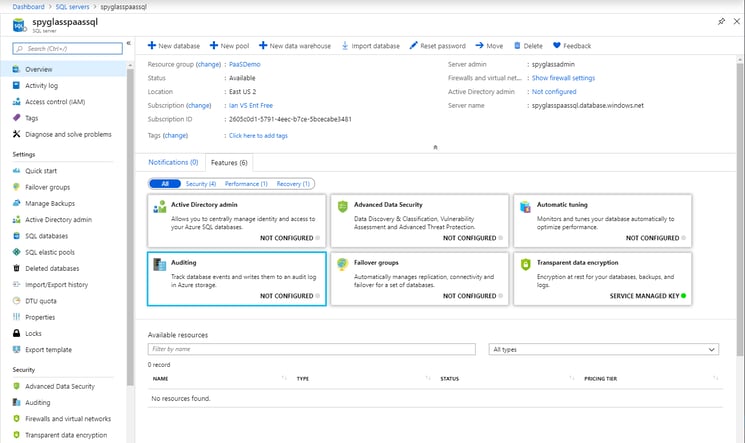
6. From the left navigation menu, select SQL Databases.
7. This will display the list of currently created databases. They should look similar to this:

8. Select Add. This will bring up the Create SQL Database blade. Select the subscription to be used and the resource group the database is to be created in. Next, specify the name of the database by entering the name Movie. Select the logical server you created above. Then, specify the compute power to be assigned to the database.
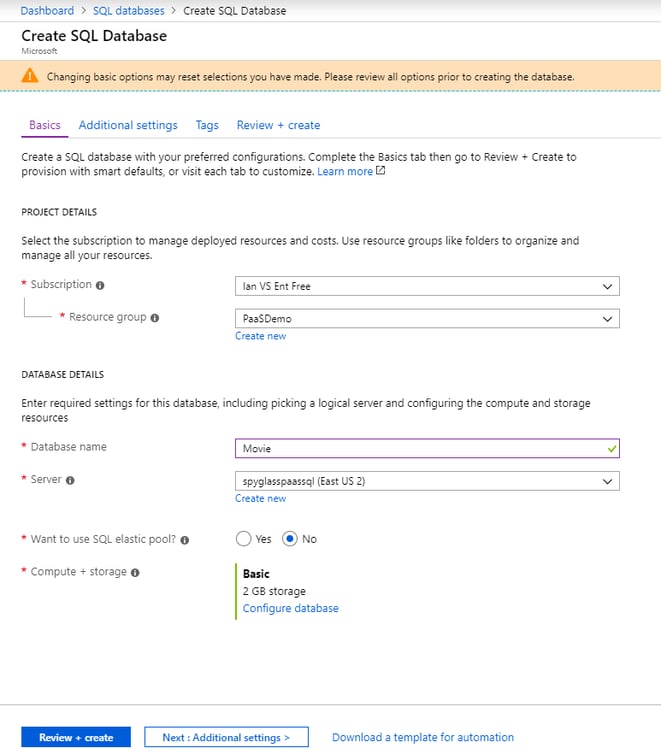
9. Click the Configure database link under Compute + Storage. This will bring you to the blade that will allow you to select the amount of storage and compute power to be assigned to the database. This blade is constantly changing, but it may look something like this:
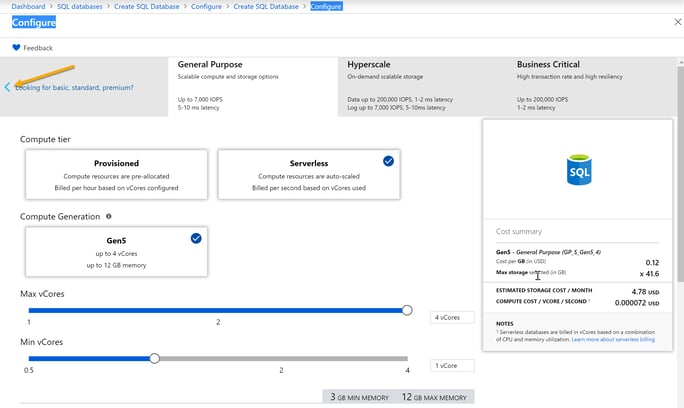
10. Select the left arrow to navigate down the performance tiers. Select Basic and set the database size to 2GB.
Note: The size and options for database power are changing constantly, so your blade may look different to the one shown. The new hyperscale databases allow for extreme speed and size, with amazing backup and restore capabilities at a cost.
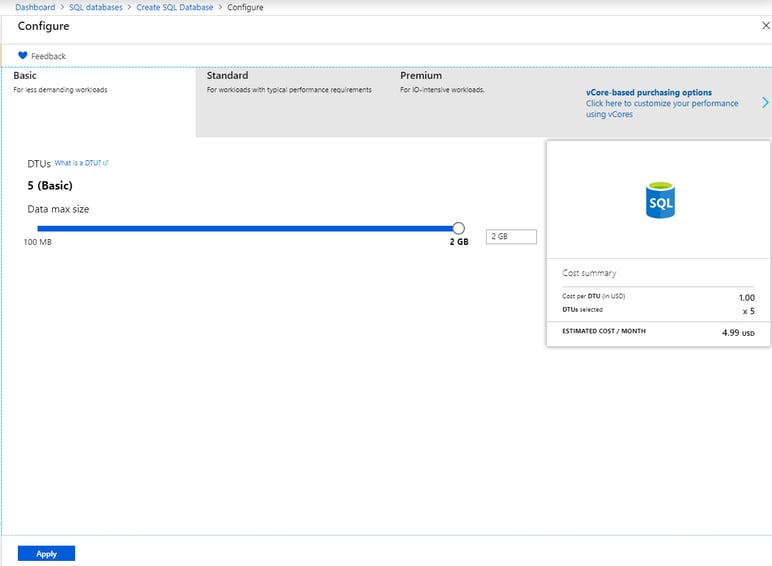
11. Click Apply.
12. Click Next: Additional Settings. Leave the default values selected.
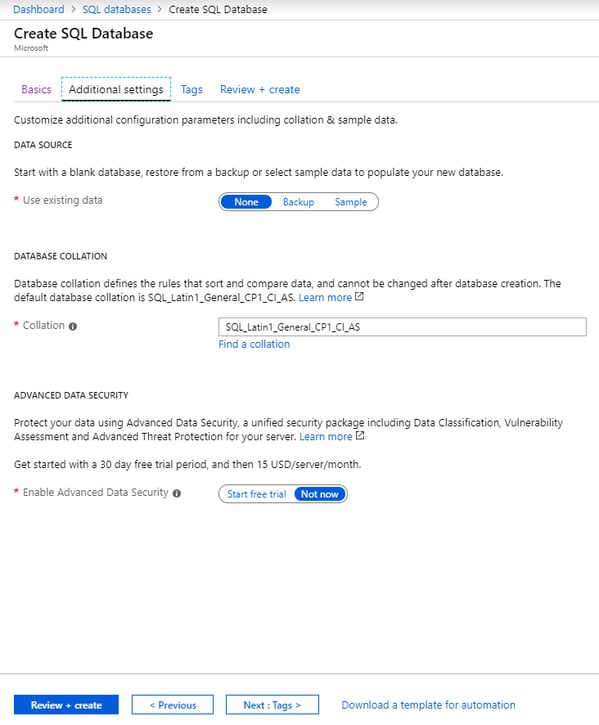
13. Click Next: Tags. Complete the wizard to create the database.
Step 7: Connect Your Application to Azure SQL
1. Once the database has been provisioned, you should see it in the list of databases.

2. Select the database you created. The overview blade will be displayed. Select the Show database connection strings link.
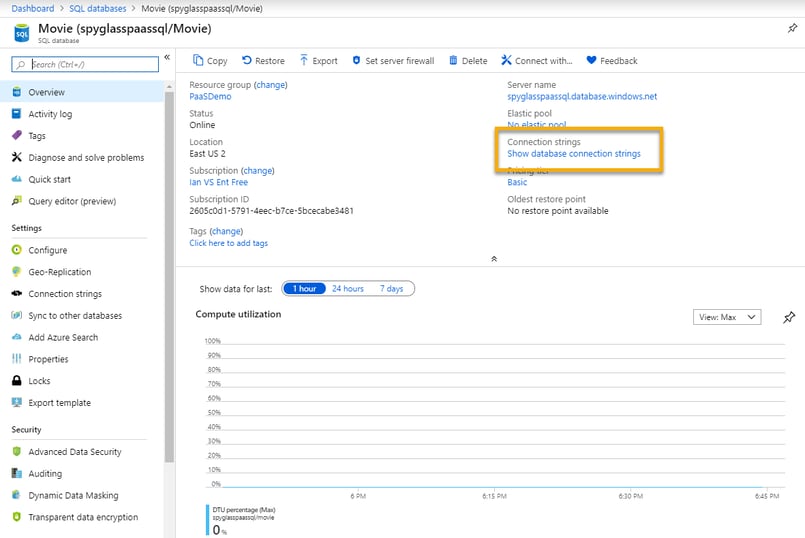
3. Copy the ADO.Net connection string to the clipboard.

4. Open Notepad (or an alternate text editor of your choice) and paste in the string. Edit the value. Replace {your_username} with the account name you used when you created the SQL Server in step 3. Replace {your_password} will the password you specified in step 3.
Copy this modified string:
Note: The username and password you are using is a full access account. This is a demo and so is not something that should be done in production. In a real environment, accounts would be created with restricted rights to reduce the chance of a security incident.
5. Select App Services from the left navigation menu.

6. From the list of applications provided, select the application to be connected to the SQL database. From the App Service overview blade, select Configuration.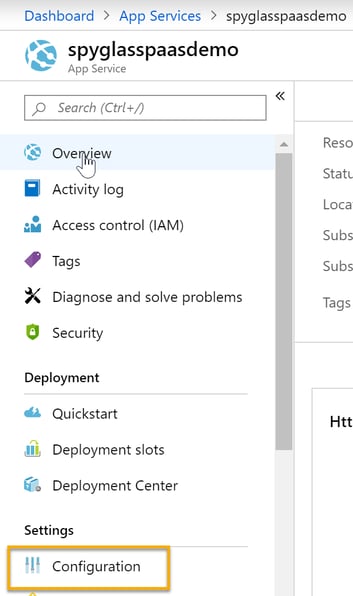
7. From the Configuration blade, scroll to the bottom. Under “Connection strings,” click New connection string.
8. In the "New connection string” dialogue, enter the name MovieDBContext. This is the name of the connection string parameter found in the original web.config. This value will override the value specified in the web.config (we saw the value displayed on the Demo Data page earlier).
Paste in the value you copied. Set the type to SQL Azure. Save your settings.
9. Return to the app service overview blade and select Restart to restart the application.

10. When the application has restarted, open a new browser window and navigate to the application.
11. Click the MVC Movie link. This should display a page similar to the one below:
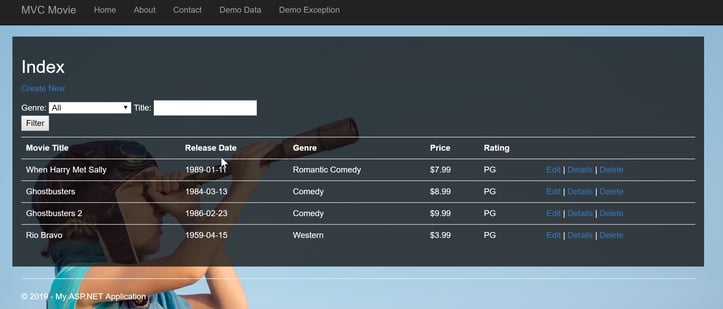
12. Exercise the application by editing, creating and deleting records. The application is fully backed by an SQL database.
You’re Connected to the Azure SQL Database
Congratulations! You’ve just created your first Azure PaaS application and connected it to an Azure SQL Database. This is an exciting moment, but there’s still much to remedy. The SQL access is using a privileged account, the URL is tied to azurewebsites.net, and there’s no SSL or required login credentials—but the foundation is there. You now have a basis from which to learn and explore Azure. If you have any questions or need help, Spyglass MTG is here for you. Let’s get started!

