In this blog series, I’m walking through a step-by-step guide that will show you how to move your first ASP.Net application to Azure Platform as a Service (PaaS). This is the third installment of the blog. In part one of this series, I showed you how to download the source code for the simple ASP.Net Application we are migrating. I also showed you how to get it running in Visual Studio 2017 or 2019. In part two of this series, I showed you how to set up your Azure App Services account and the relevant resources for the application. Now, in part three of this blog, we will walk through deploying the application on Azure.
Step 4: Deploy the Application to Azure
The deployment methodology we are going to use is suitable for a development deployment but not for a production deployment, since we will be deploying directly from Visual Studio.
1. Open Visual Studio, and open the solution.
2. Select the solution, and click the Right Mouse Button and select Publish.
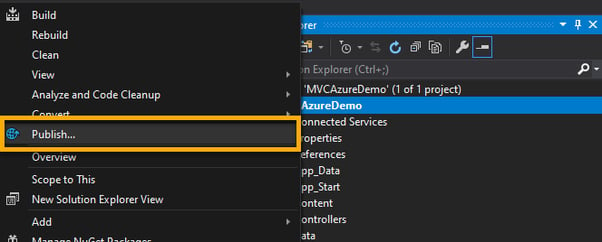
3. If you are prompted to log-in to Azure, log in using the account credentials you used in the Azure Portal.
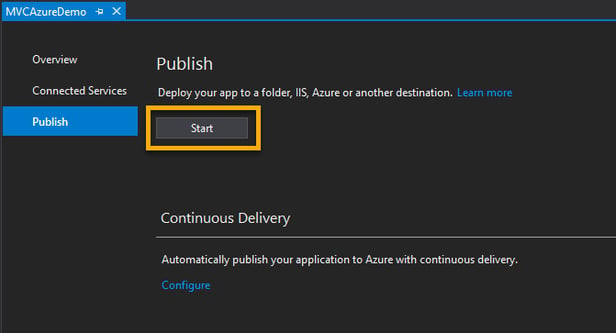
4. The Publish Wizard is presented.
Click Start.
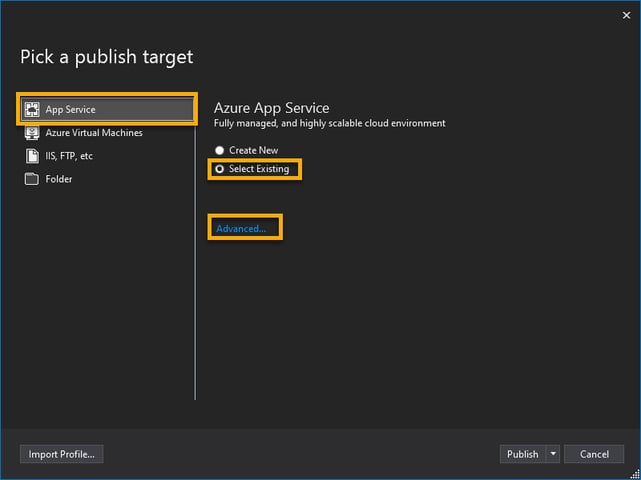
5. In the Wizard, select App Service. Click Select Existing. Then, click Advanced.
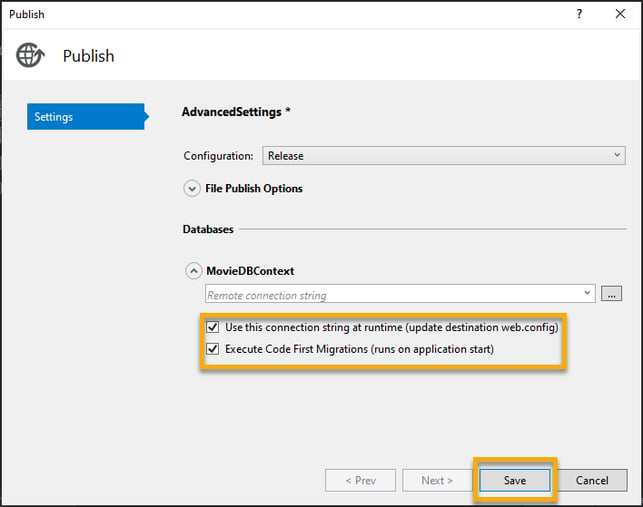
6. In the Advanced Dialog Settings, select both check boxes, and click Save.
7. Click Publish.
8. In the Azure dialog, select the correct subscription. Select Resource Group, and then select the resource group you created earlier.
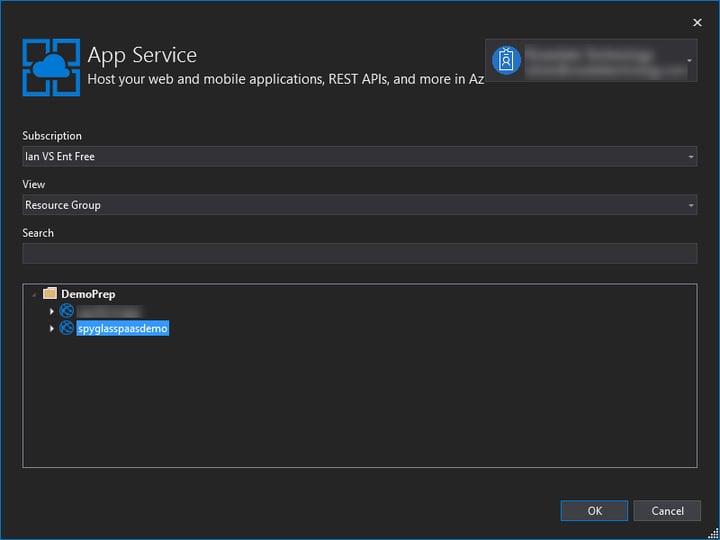
Select the App Service you created earlier.
9. Visual Studio will now compile the application and deploy it to your App Service.
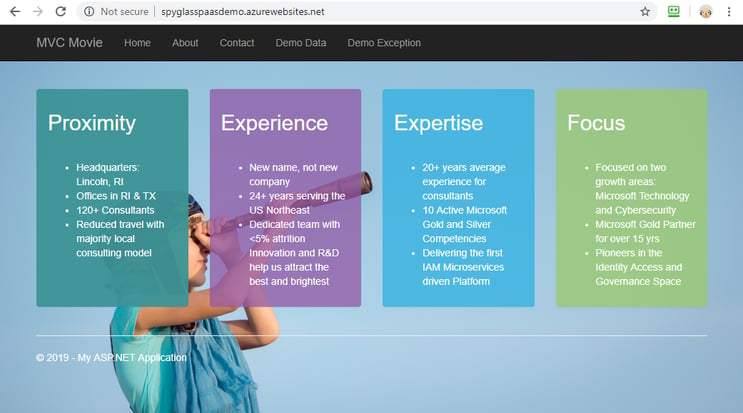
10. Once the deployment is complete, a browser will be launched to the app endpoint.
What’s Next?
By following the above steps, you will have deployed the ASP.Net application on Azure PaaS. In the next installment of this blog, we will go through application configuration settings in Azure. The blog after that will focus on creating and connecting to a SQL database.
If you need any assistance or want to talk about the potential of Azure in helping your business succeed, reach out to Spyglass MTG. We’re here to help!
Read part four of the blog series: Moving Apps to Azure Part 4: Setting Up Configuration Settings in Azure.

