Form Processing Model in AI Builder
At last year’s Microsoft Business Application Summit, Microsoft announced that they will be investing in the Artificial Intelligence in the Power Platform. The Power Platform is known for being a low code platform that enables organizations to analyze information, act on it through applications and automate their day to day business processes. It allows everyone from professional developers to the end users to be able to build apps.
What is Form Processing Model in AI Builder
The AI Builder Form Processing model targets key value pairs and table data typically found in the forms such as invoices, receipts, statements etc. It uses machine learning technology to identify the structured data in the form, which is then output in a format that matches the original document. AI Builder is useful for visually processing forms, extracting their data and making it available for further use. For example, you can convert key-values of the form into metadata in SharePoint Online. The AI Builder allows you to use sample documents to analyze the new documents and extract information based on the model you created. The accuracy of extracting the document data from its key values depends on the model that you created on the sample documents.
Test Case
An insurance company uses CRM to manage their business process. For every new work item, a health insurance agent creates a new entity record in CRM. Contractors are then assigned to the SharePoint online site. They analyze the information and prepare a quote, and that quote gets attached to the record as a notes attachment. A salesperson then manually downloads the attachment, reads the quote and updates the quote details on the SharePoint site. They must do this every time any new quote document is attached to the record.
The current process is time consuming and requires a lot of human intervention to get the most recent quote information on the patient record.
Now, we can make use of the Form Processing AI model and Power Automation to automate this process and make it easier and quicker for everyone.
Licensing
(before you get started) https://docs.microsoft.com/en-us/ai-builder/administer-licensing
AI Builder is licensed as an add-on to your Power Apps, Power Automate, or Dynamics 365 license. This means you can start your AI Builder trial after you have a Power Apps, Power Automate, or Dynamics 365 license that allows you to create a Common Data Service environment.
For detailed information about AI Builder licensing visit the link below:
Getting Started
Create a Model
- Sign in to https://web.powerapps.com.
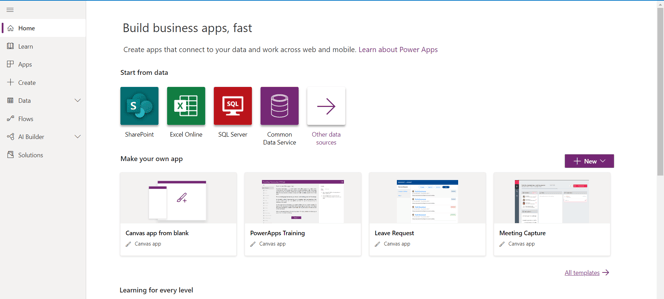
- Navigate to Models under AI Builder.
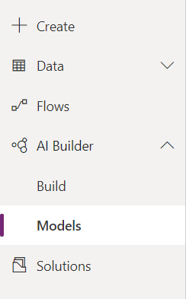
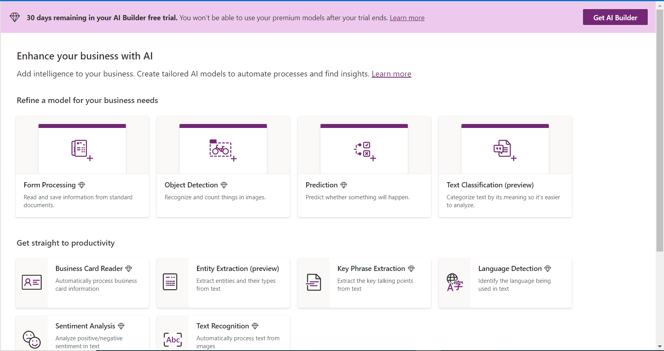
- Select Build a Model

- Click on Form Processing model
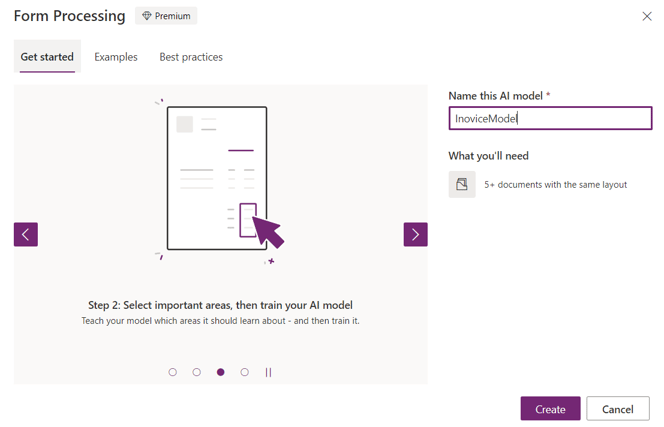
- Give it a name (ex. Invoice Model)
Sample documents
The documents that you have must meet certain requirements, otherwise, the model will fail with errors. As an example, we will be using the sample documents that Microsoft provides. To obtain these documents, click on Get Sample Documents and download:
AIBuilder_Lab\Lab Images\FormProcessing_Invoices\Train
We have 5 different versions (data) of the same report in the Train folder. We will use these five pdf files as sample data for the Form processing model.

Analyze Documents
- Click on the Add Documents button and select all the sample PDF files and upload it.
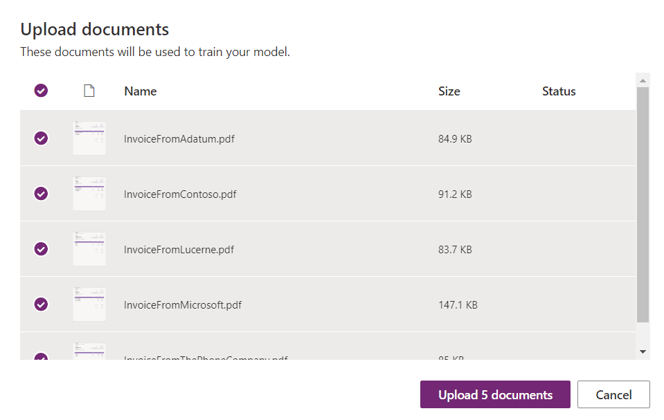
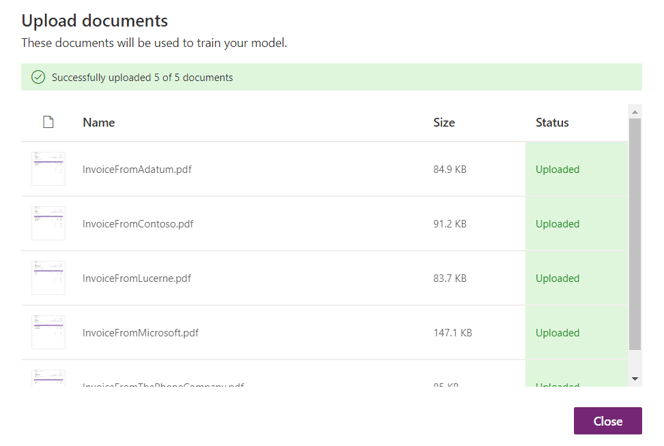
Once all the documents are uploaded, close the window and click on the Analyze button. This will save the model and start analyzing the documents.
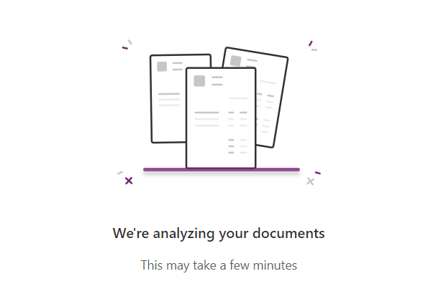
This process will take few minutes and will ask you to select a field. The fields that we need to select in the next step are analyze steps, analyze the structure of the document, identifies the key value pair, table data and expose.
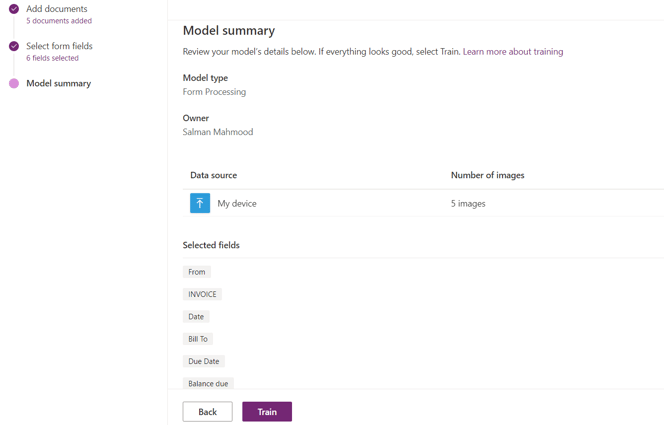
Select form fields
Here we need to select data that we want to extract from the document. Click on Process Quote Model Form. This will open a screen with all the possible data that the model can extract.
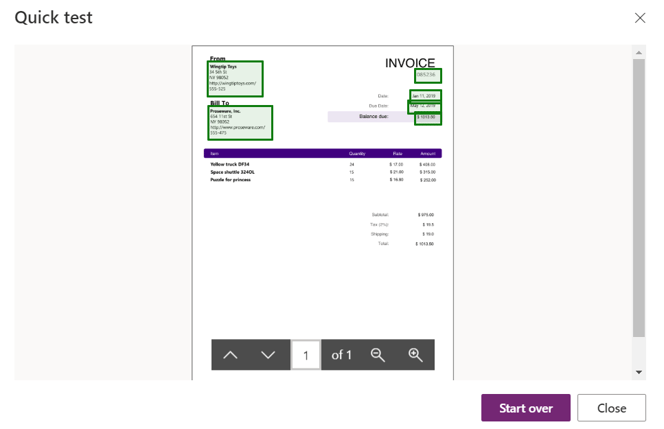
We can either select all the fields or we can select only the fields that are needed. Here we have selected the From, Invoice, Date, Bill To, Due Date and Balance Due fields. Click on the Done button to save the field selection for the model. Click on the Next button to train the model using uploaded sample documents.
Train, Test and Publish Model
- Click on Train button to train the form processing model.
The screenshot below shows the model training is completed and you can now quick test your model.
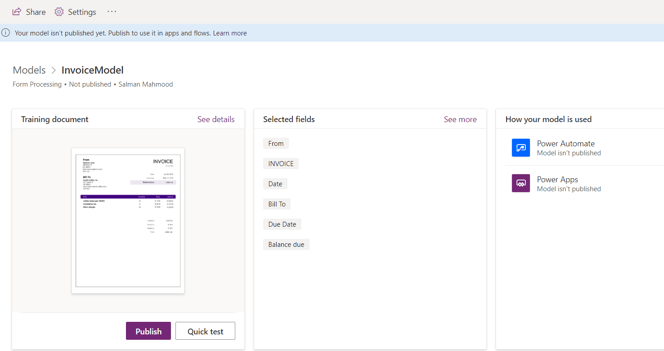
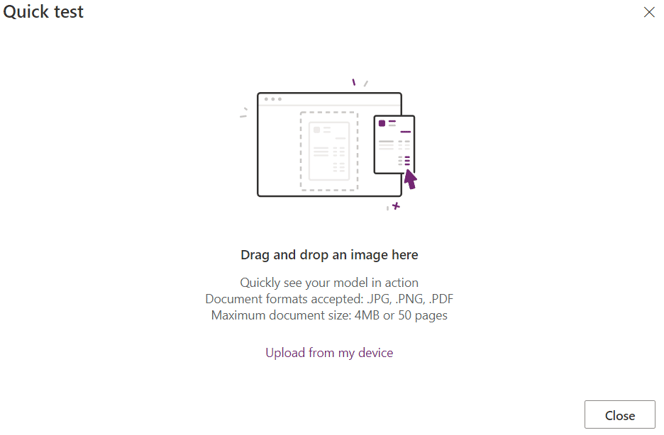
We can test the model by using the Quick Test button. Upload the new document and check if it extracts the information that we wanted or not. Finally, click on the ‘Publish’ button to publish the Invoice model.
Create Power Apps and use Invoice Model
- In the published model, you can navigate to the How Your Model is Used section to select Power Apps.
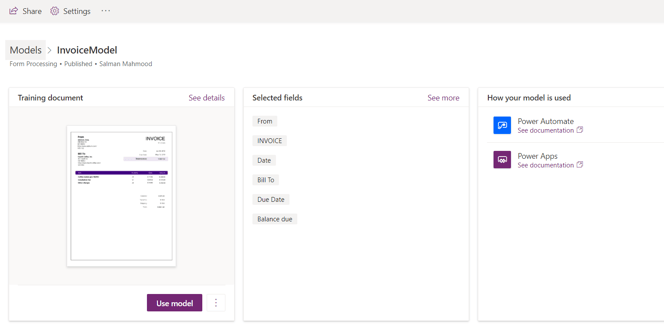
- Select Create New App.
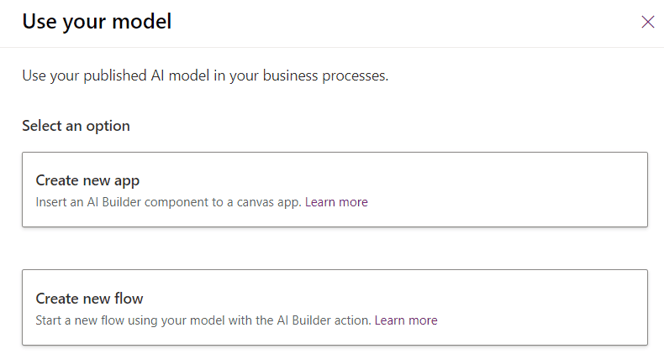
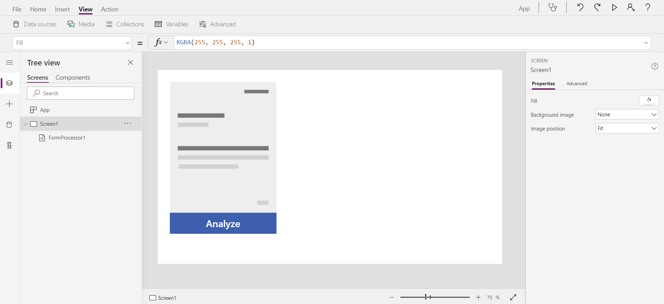
- By default, when you select New Power App from the published model screen, it will add an Analyze section in the first screen of the app.
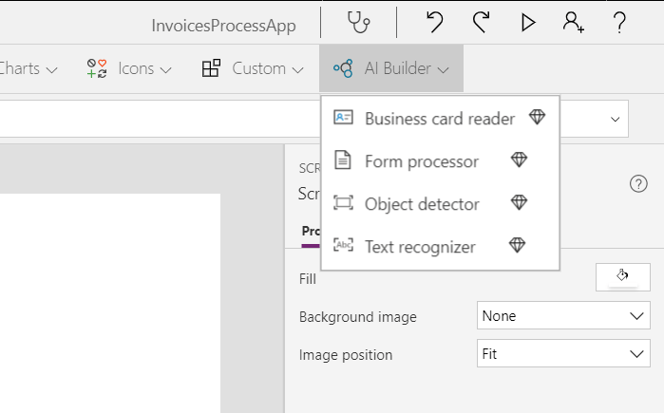
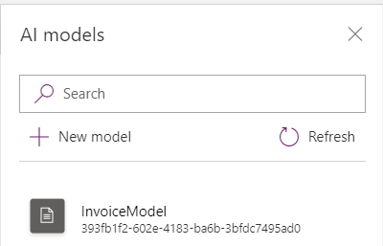
- Navigate to top bar in the PowerApps. Select AI Builder -> Form Processor and select the Invoice Model that we just created.
- In Form Processor control, selecting OnChange will add a collection colFormProcessor to store the information that it extracts from the form for future use.
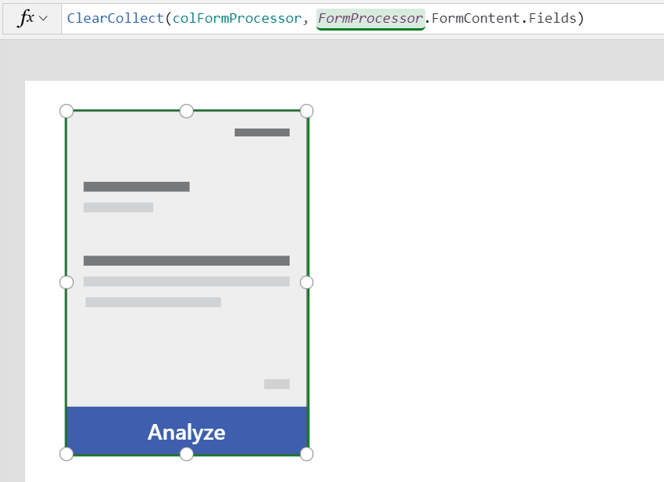
- Run the app and select one of the Test forms to see what information the FormProcessor can analyze and extract to store in the collection we created.
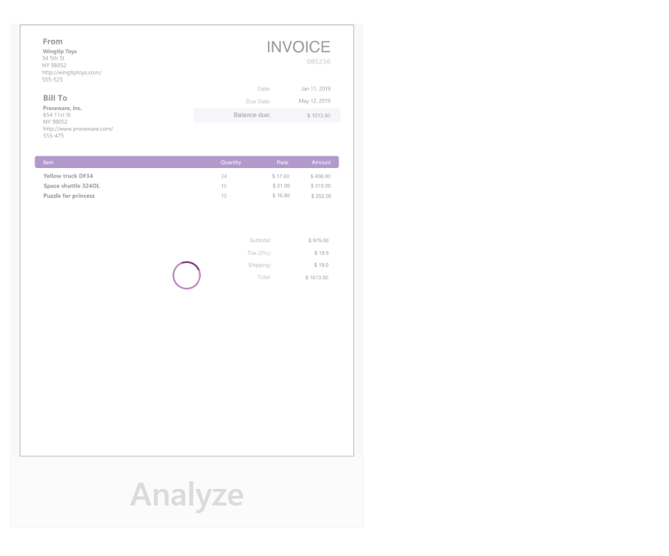
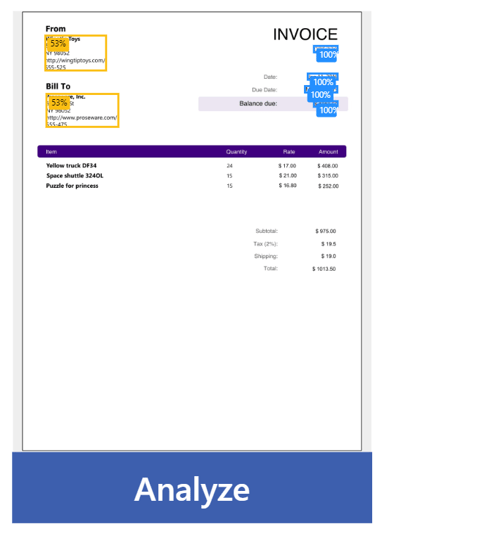
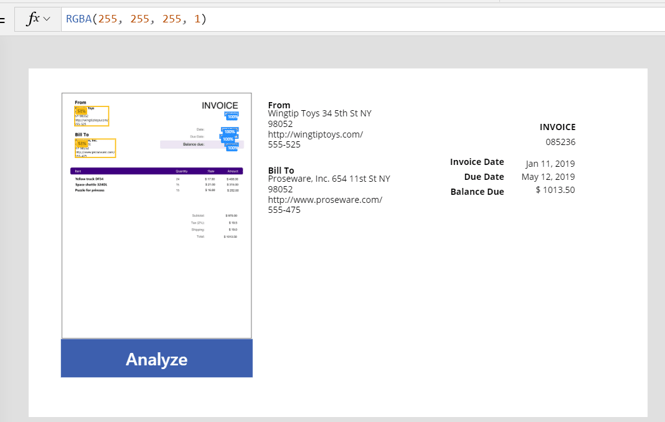
- Navigate to Data Collections and check the key values and information your model processed.

- Add a Gallery Control and set the Data of the Gallery control to the colFormProcessor
Create SharePoint Document Library
We will now create a SharePoint Online Document Library where we want to store the invoices and the key-values.
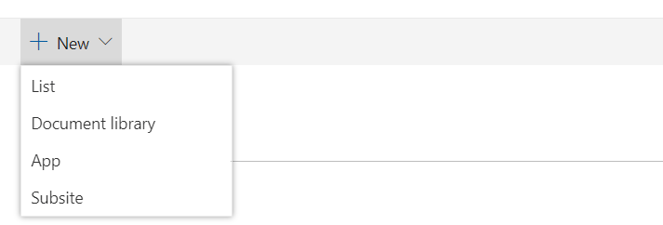
- Navigate to your SharePoint online site. From the menu, select New-> Document library
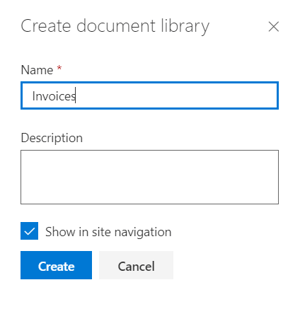
- Give the name Invoices.
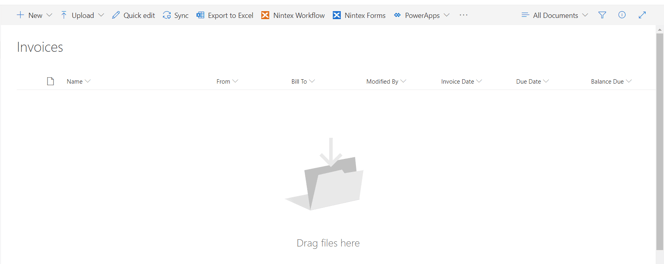
- Add fields for the key-values you want to store from the PowerApps created.
Connect SharePoint Document Library with the PowerApp
Now, navigate back to the PowerApp you created, and add a connection to the SharePoint Document Library.
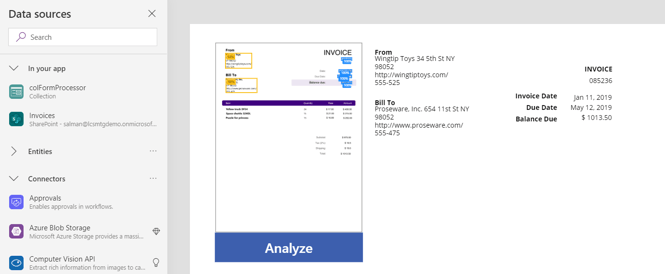
Next, we will add a form and connect it with the SharePoint Document Library, Invoices. We will use these fields as form fields to modify the data before we process this to the Document Library.
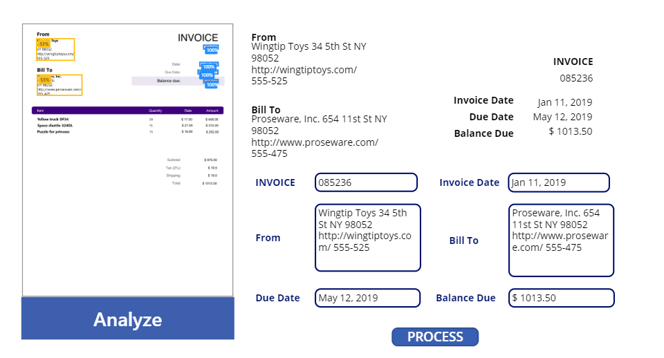
Automate Business Process Using Power Automation
Now, navigate to PowerApps. Select Actions -> Power Automate to add a new process for your App.


It will create a new flow and show the first action as PowerApps to trigger this business process.

- Add Create file Action from SharePoint Actions. For file name and content, select Ask in PowerApps

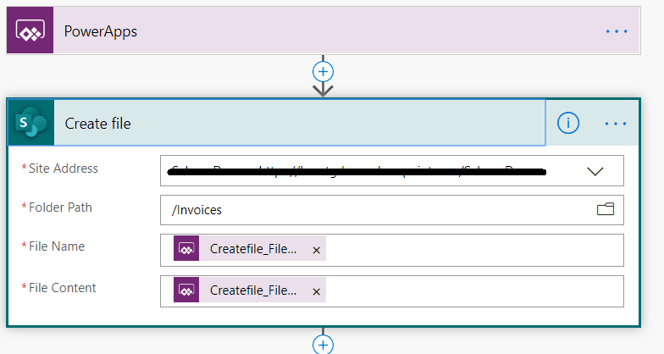
- Add another action from the list to update the file properties. Select itemId for Id and File Display Name for Title field from the previous action and for all other fields select Ask in PowerApps.
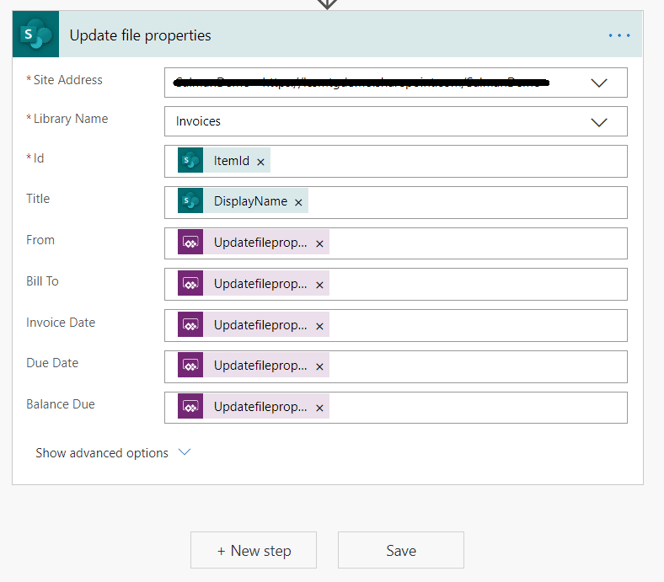
- Once you are finished, save the process and navigate back to the PowerApps.
Update PowerApp with the Invoices Process Flow
Click on Process Button Add the formula InvoicesProcessFlow.Run and pass all the values you want to store with the file in the SharePoint Document Library.
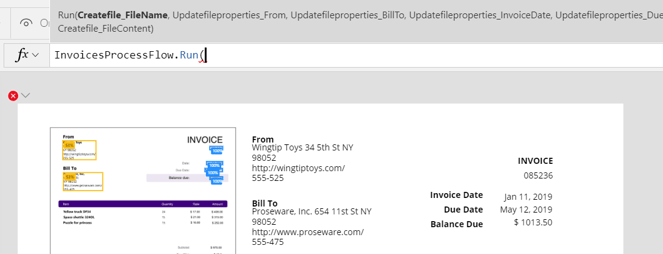
Once we add all the values from the form into the InvoicesProcessFlow.Run formula, run the App and select a Test Form. Analyze the form to check the values, update the values as needed and click on PROCESS.
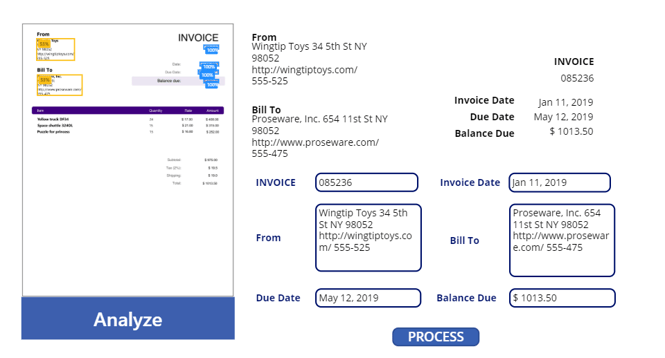
Processing this will trigger the Power Automation Process and pass all the key-values to the flow. The flow will create a file in the SharePoint Document Library and update the key-values with the file as below.

Conclusion
Using only a few resources like AI Builder, SharePoint document library and almost no code, we can create an automated system to process Invoices uploaded from user system. The information from these invoices can then feed to other systems as required.
The Next Move
As we’ve seen in this blog, the Form Processing AI model combined with PowerApps and Power Automation offers users advanced capabilities for AI technology in PowerApps. Furthermore, these apps often require no code, so anyone can build one.
While PowerApps is easy to use by design, there is a lot involved when it comes to making it work best for your enterprise needs. If you have any questions on this guide or want to work with our expert SharePoint and PowerApps practitioners, please contact us today. We’re here to help you make the most of your Microsoft environments!

