This blog is a follow-up to part one of this series, where we are providing a how-to guide to create a PowerApp that extends the functionality of SharePoint. It is designed to help businesses get started with building with Power Apps. Specifically, this guide walks you through everything you need to create an Event Registration and Management Dashboard PowerApp, which is an app we’ve delivered for a client in the past. The app enables event managers and participants to easily organize events, like a corporate conference or trade fair, on one dashboard on SharePoint.
Building with PowerApps adds all sorts of useful functionality versus what SharePoint can provide alone, such as enabling event attendees to self-register quickly and easily and sign up to receive updates about events, cancelation and general information. Event managers can track registrations, check-in event participants and view statistics about event attendance on one dashboard.
In part one of this blog, we worked exclusively in SharePoint. We set up a SharePoint site, created custom lists (such as attendees, events and sessions) for the event registration app and added some data to work with on the events and sessions. Now, in this blog, we’ll build the event registration app in PowerApps, connect it to our custom lists and embed it in SharePoint. At the end, you’ll have a functioning events registration app in SharePoint.
Let’s get started.
Create an App in PowerApps
In the lead up to this step, we set up a series of custom lists in SharePoint for attendees, events and sessions. These lists store event data that can be used by the PowerApps dashboard for event scheduling tasks. Now, we are switching gears to work in PowerApps. In this step, we are ready to create the Event Registration and Management Dashboard PowerApp.
Open a Blank App in PowerApps
- Sign in to PowerApps.
- Under Make your own app, select Canvas app from blank.
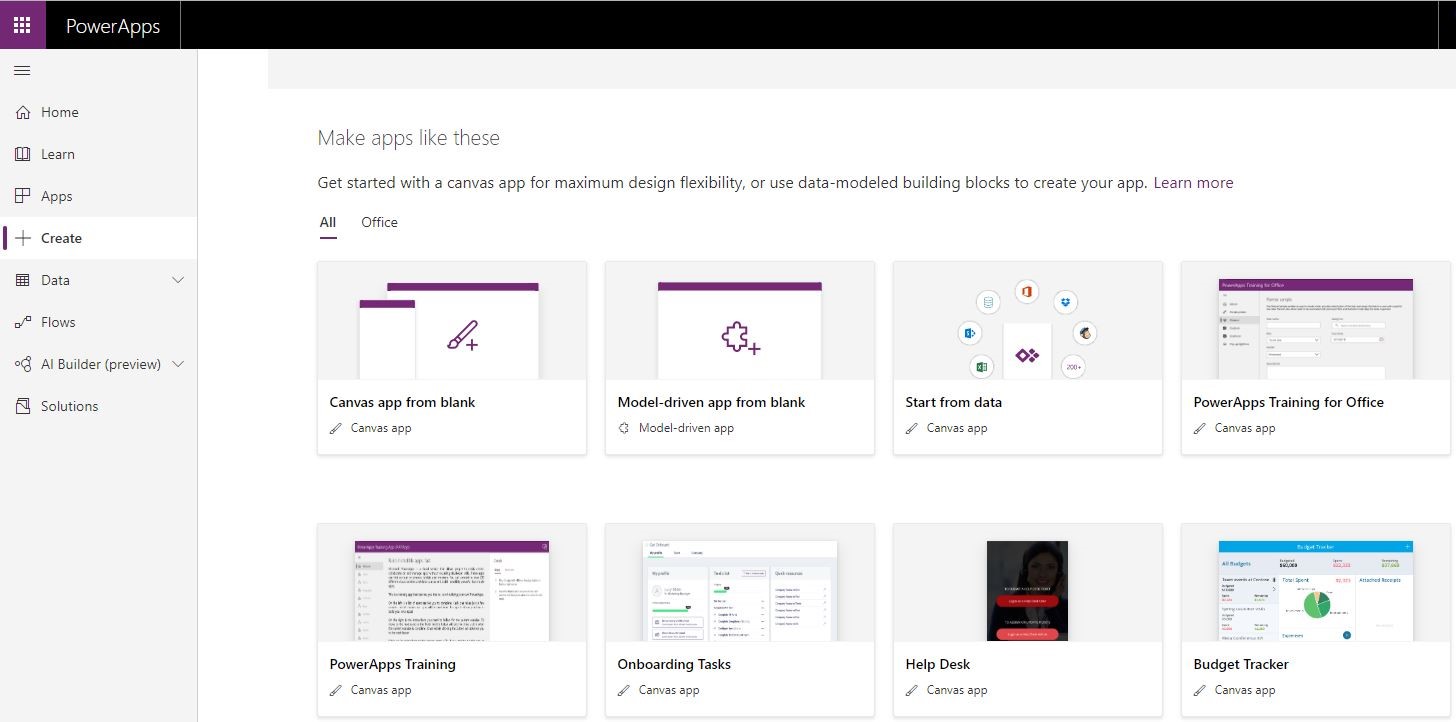
- Specify a name for your app. Select Tablet, and then select Create.
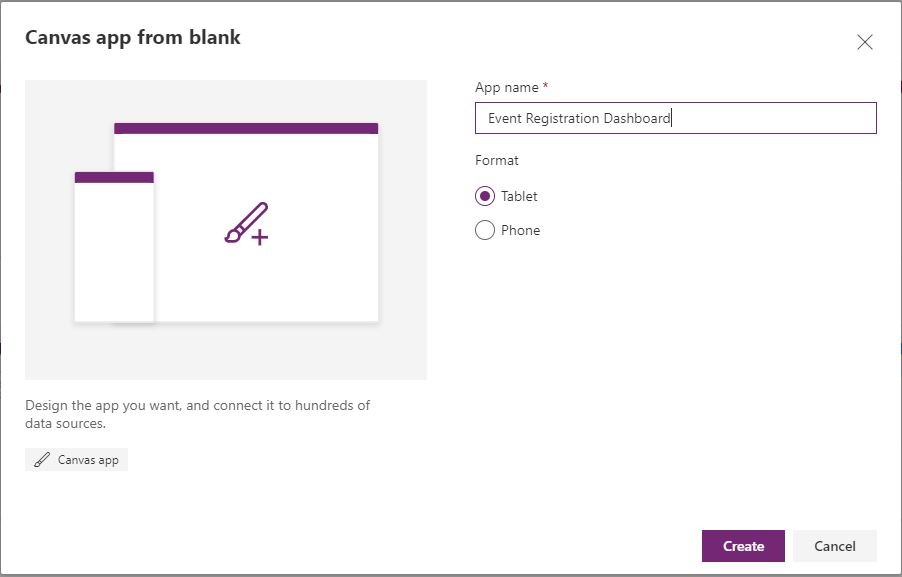

- Rename the Screen1 to Dashboard.
Connect to the Event Registrations List
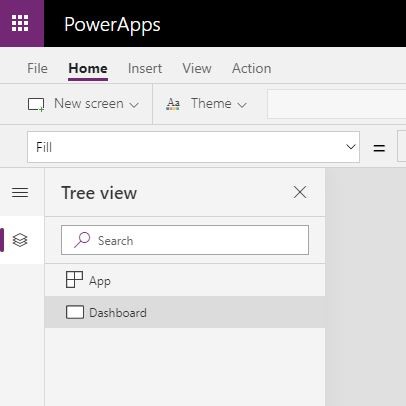
- Click View.
- Click Data sources.
- In the Data pane, click Add data source.
- Select SharePoint.
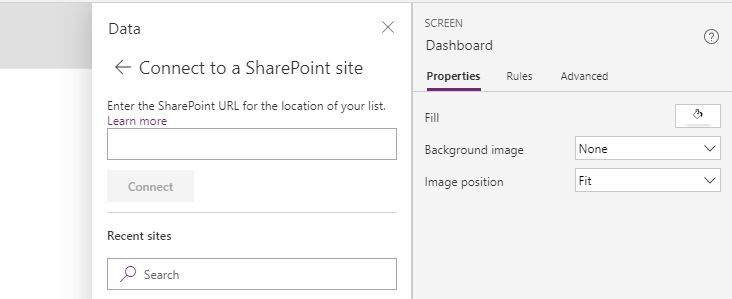
- In the Recent sites list, select the SharePoint site where you created the Registrations List.
– Note: If the site does not appear in the list, enter the URL to the SharePoint site in the textbox, then click Go. - In the Search textbox at the top of the list, enter Registrations.
- Check the checkbox next to the Registrations list.
- Click Connect.
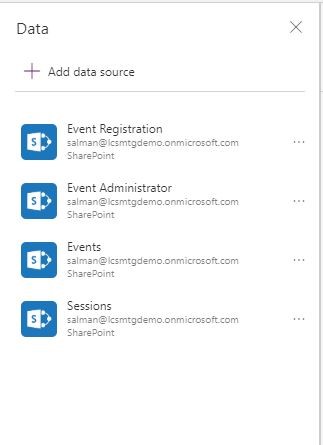
Add Images/Icons to your app
- Click View.
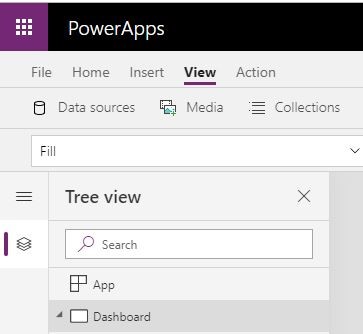
- Click Media.
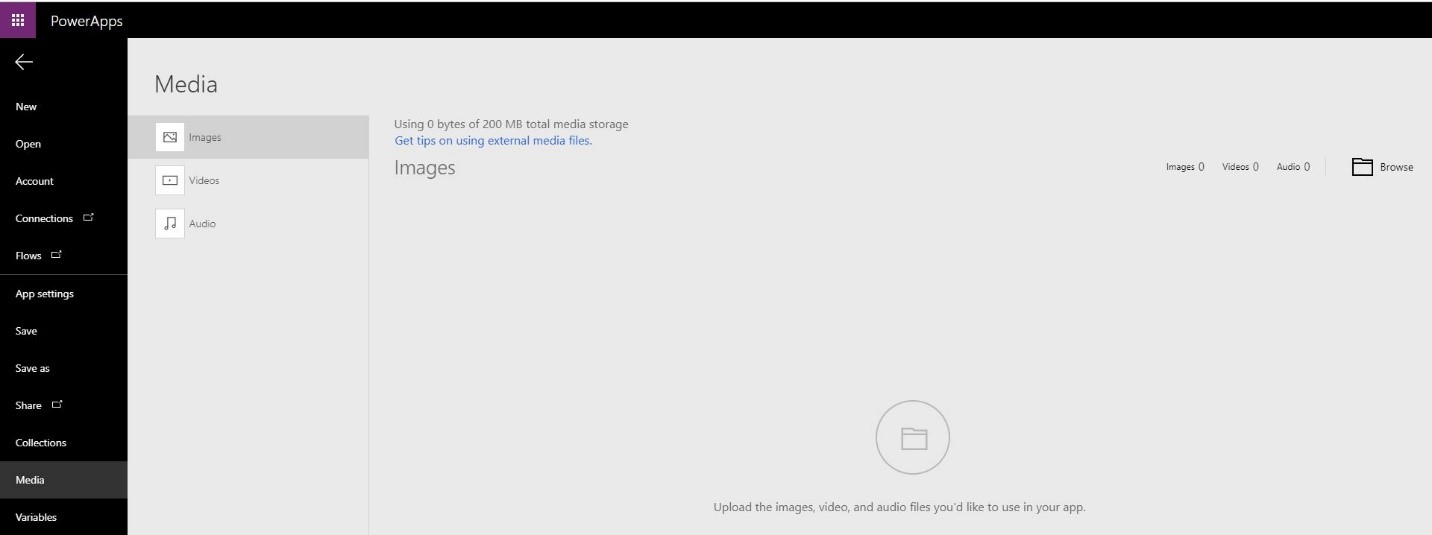
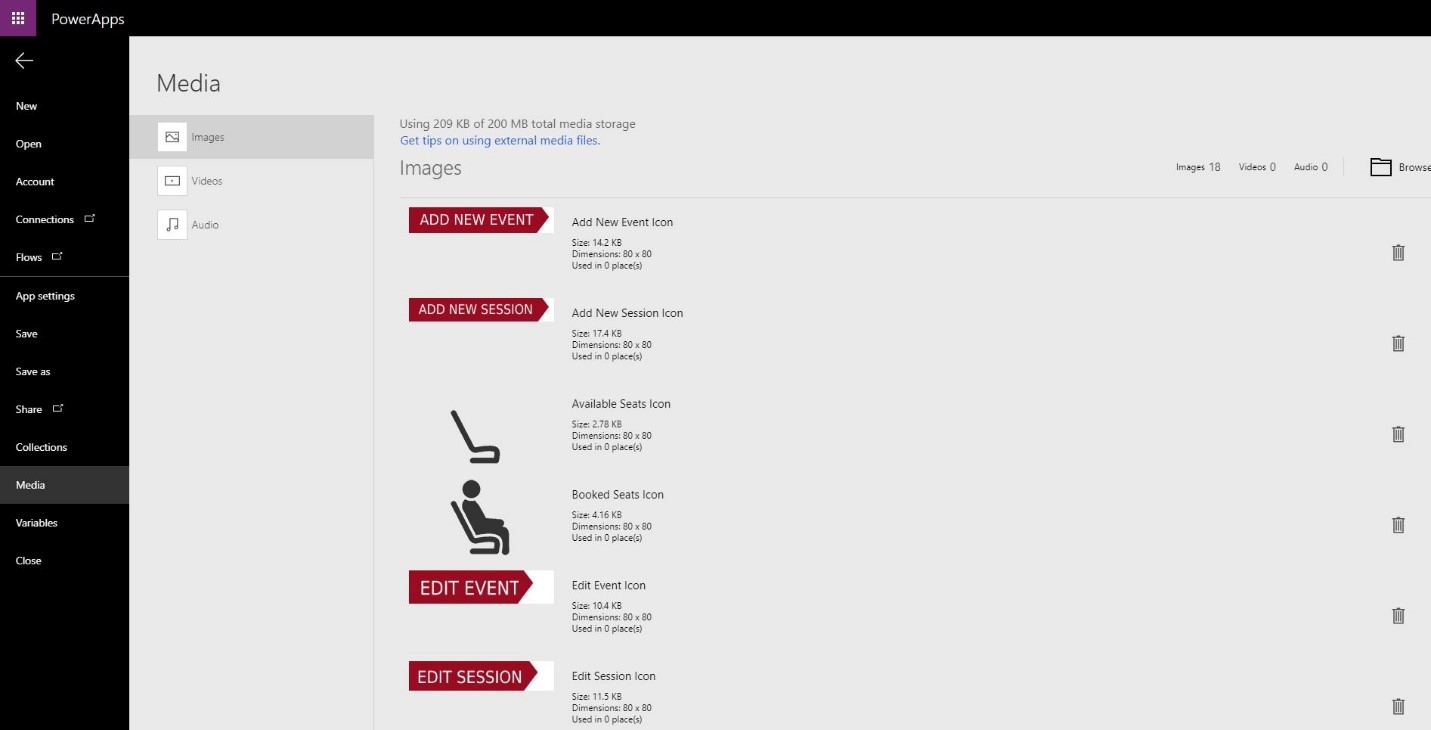
- Select all the logos and upload them.

Top Navigation
First, we will create a top navigation for our app that will display current user information (full name), help this person navigate to the app information (quick guide) and a feature to add New Events from the dashboard.

When you design your forms in PowerApps, it is better to group your labels and other controls. You can construct such a Top Navigation using the Group control, containing a Label control and two Icon controls.

Top Bar
Add icons as displayed below to display Events and Session Information in an order. In our example, the order is Events, Session Title, Calendar Dates, Location, Session Status, Booked Seats and Available Seats.

Add Events
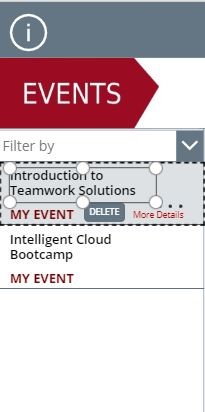
Now, add a Gallery Control from Insert -> Gallery Control. On the Properties tab, set Items to Events List. Once you set the Events List, it will start displaying the events you already have in the list. Now, you can update the design of the Gallery Template as below.
Add Sessions
Add another Gallery Control from the Inset -> Gallery Control, and set its Items property to Sessions List.

Now, update the design of the Session Gallery template as below, and update its Items property formula to filter on a selected Event from the Events list.

Create App Info
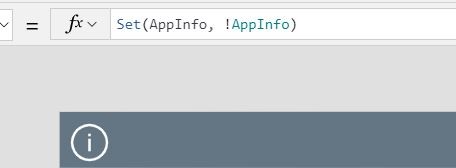
You can add a self-help guide within the app itself by using HTML text control and OnVisible property set on the icon as below.

Admin vs. End User
As we are using the same dashboard for admins and end users, we can easily configure what controls it displays for the administrators and for the end users by checking the admins in the administrators list and setting the variable to isAdmin. In our App Add / Edit Event, the Add / Edit Session functionality uses the same variable to disable and hide the controls for the end user.
We are using a SharePoint list to maintain the administrators for the app, but you can also use SharePoint group and MS Flow to trigger onStart of the app and check and set the isAdmin variable.


Create Add Event Form
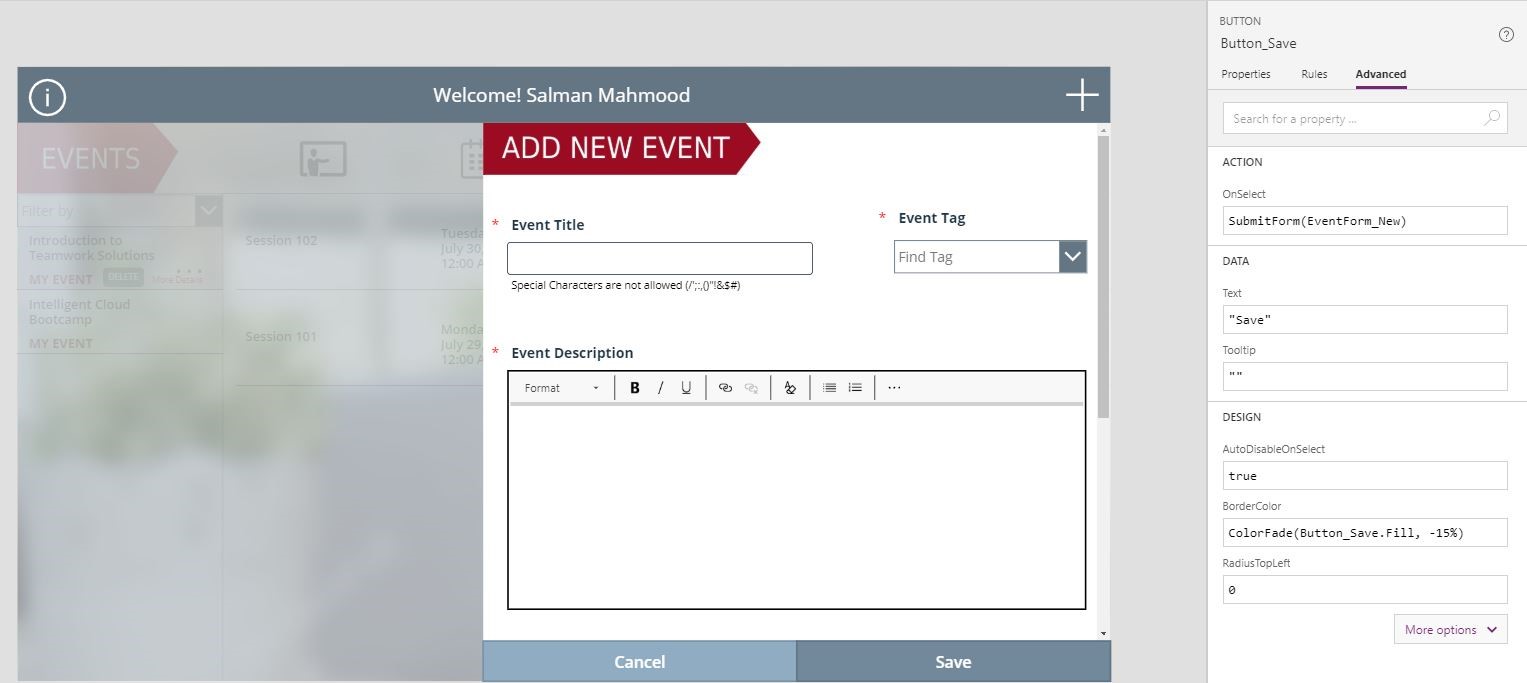
Navigate to Insert -> Forms and click on Edit Form to insert the form, and set its Data Source to Events List. Update the design of the form as below, and set the formula on Save Button to submit the form to add an entry in the Events List.
Create View Event Form
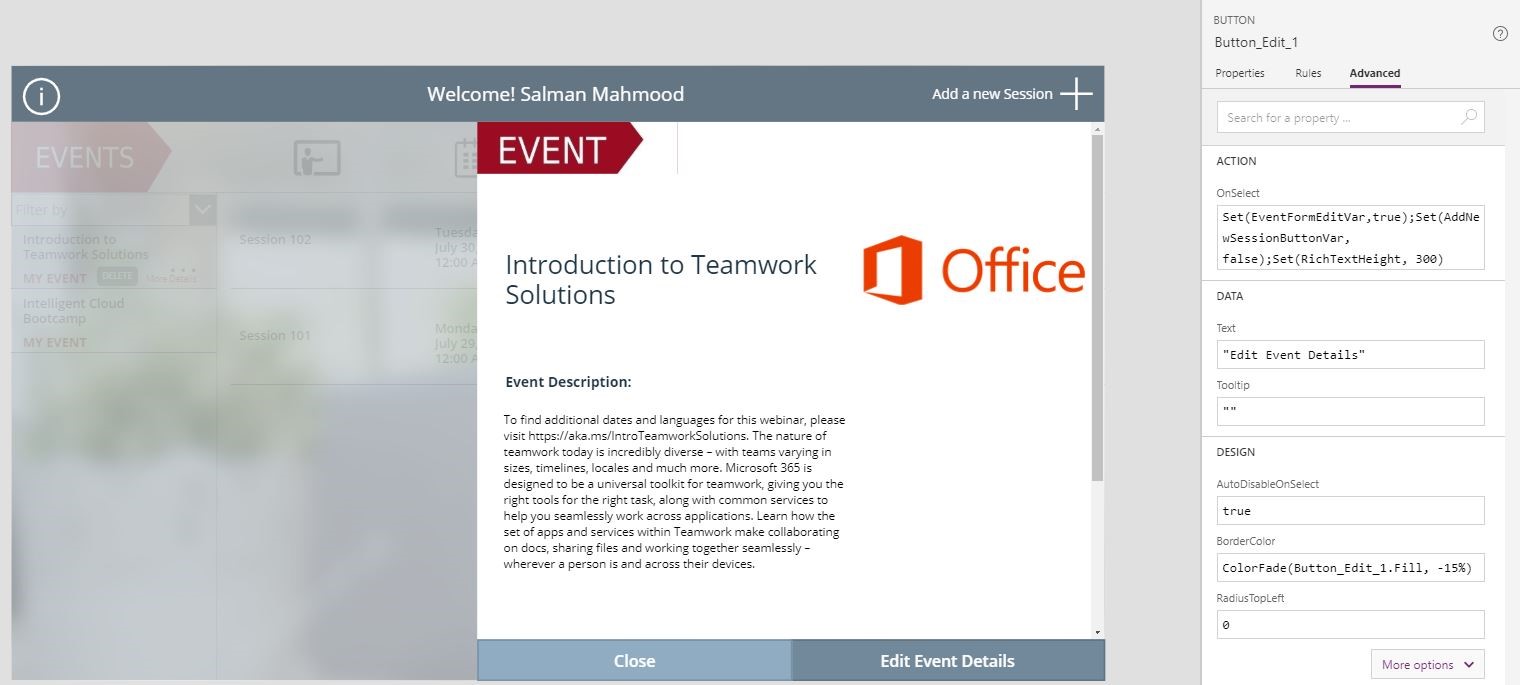
Navigate to Insert -> Forms and click on Display Form to insert the form, and set its Data Source to Events List. Update the design of the form as below, and set the formula on Edit Button to load the form in the Edit Mode.
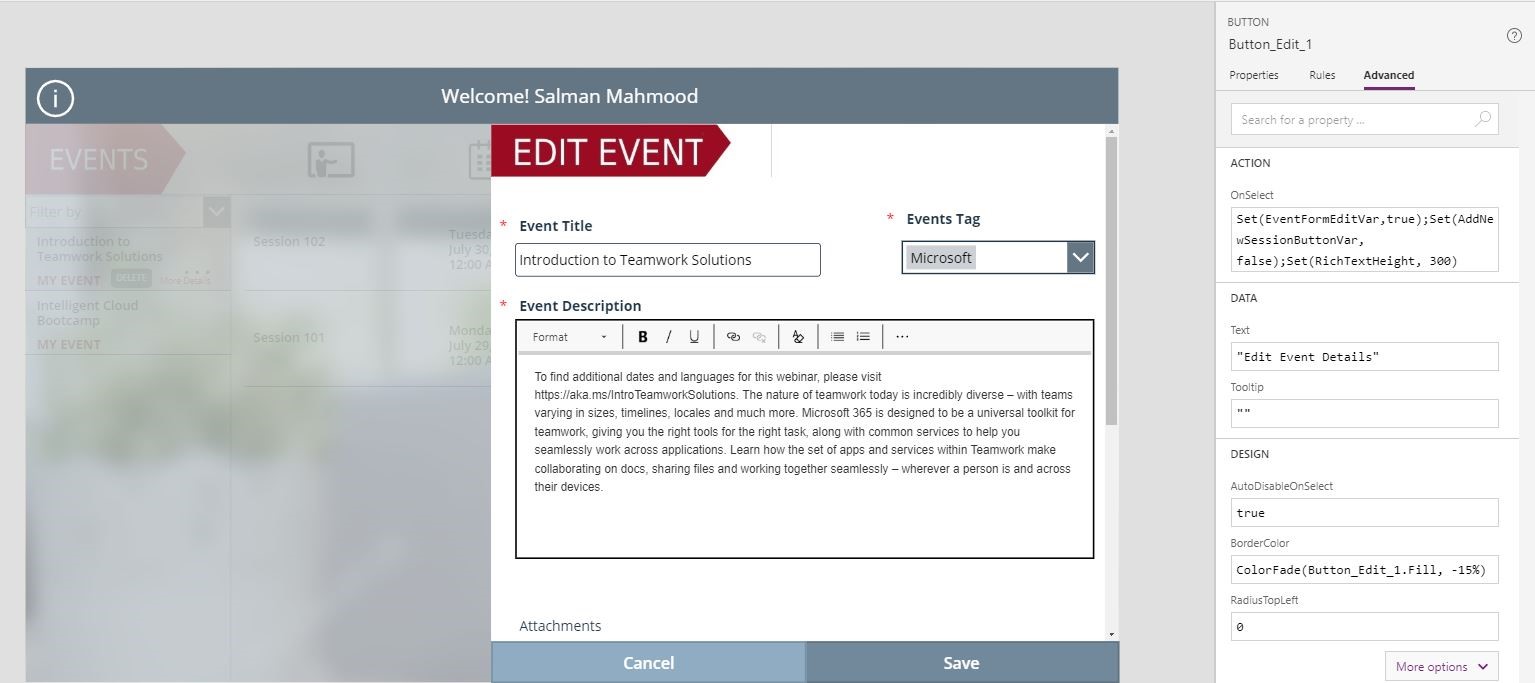
Create Edit Event Form
You can use the same New Event Form to display the selected Event in the Edit Mode.
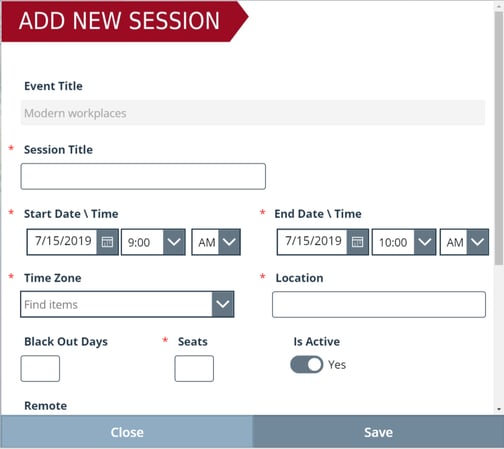
Create Add Session Form
Navigate to Insert -> Forms and click on Edit Form to insert the form, and set its Data Source to Sessions list. Update the design of the form as below, and set the formula on Save Button to submit the form to add an entry in the Sessions List.
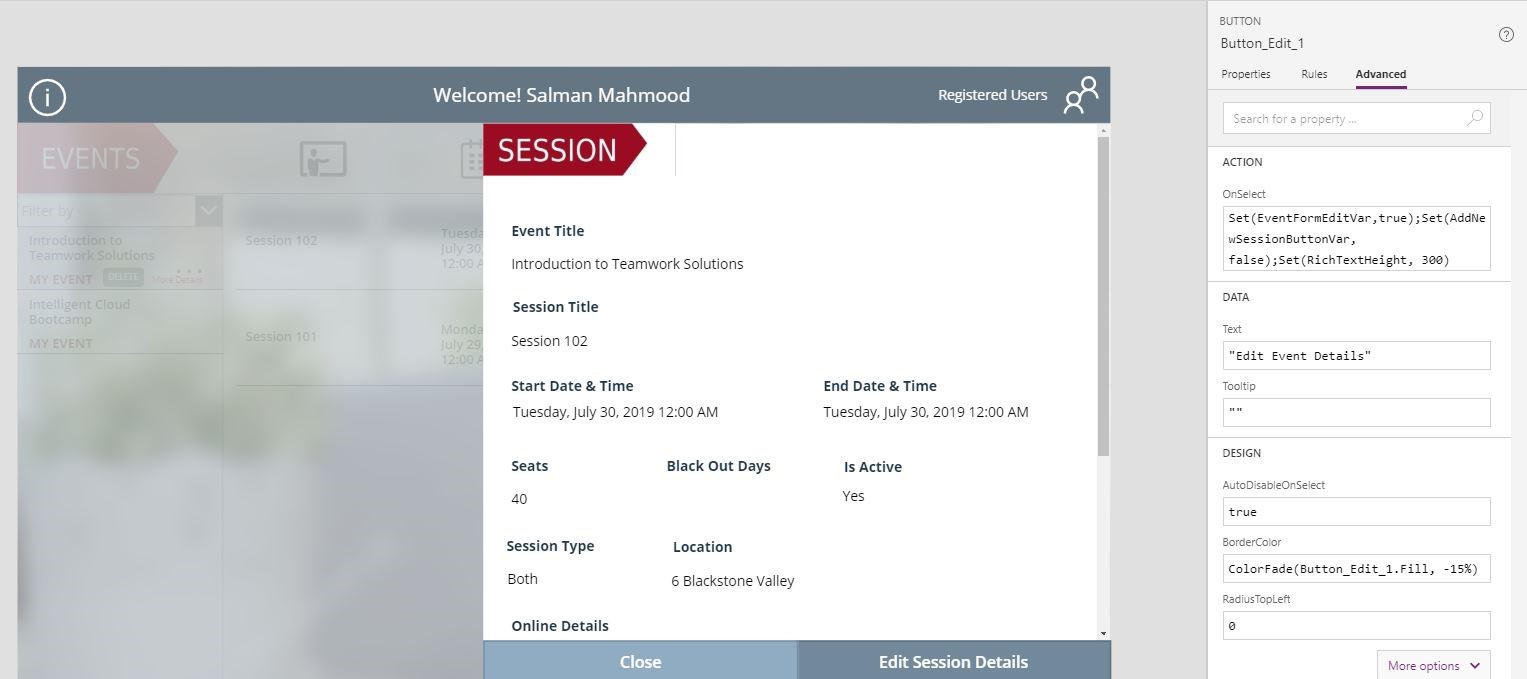
Create View Session Form
Navigate to Insert -> Forms and click on Display Form to insert the form, and set its Data Source to Sessions List. Update the design of the form as below, and set the formula on Edit Button to load the form in the Edit Mode.
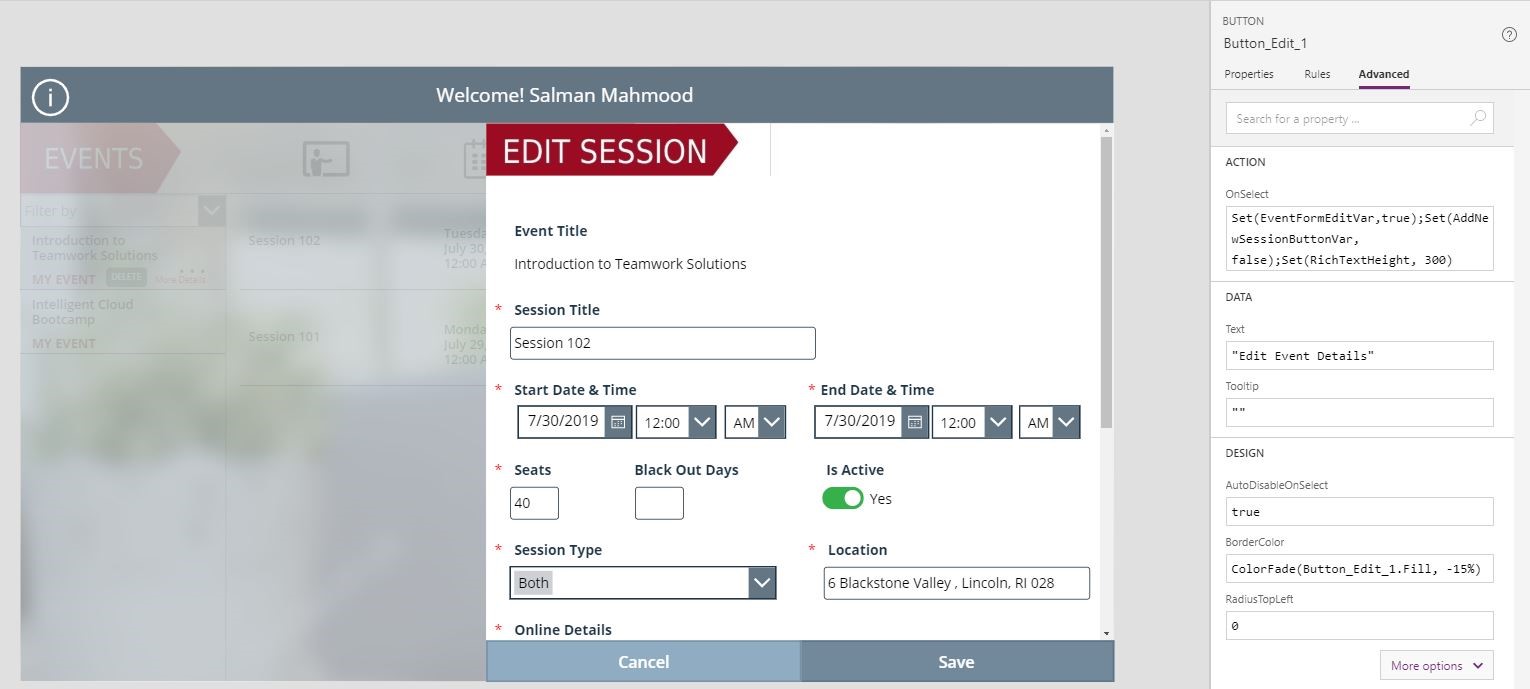
Create Edit Session Form
You can use the same New Session Form to display the selected Event in the Edit Mode.
Create Registration Form
Navigate to Insert -> Forms and click on Edit Form to insert the form, and set its Data Source to Registration list. Update the design of the form as below, and set the formula on Save Button to submit the form to add an entry in the Registration List.
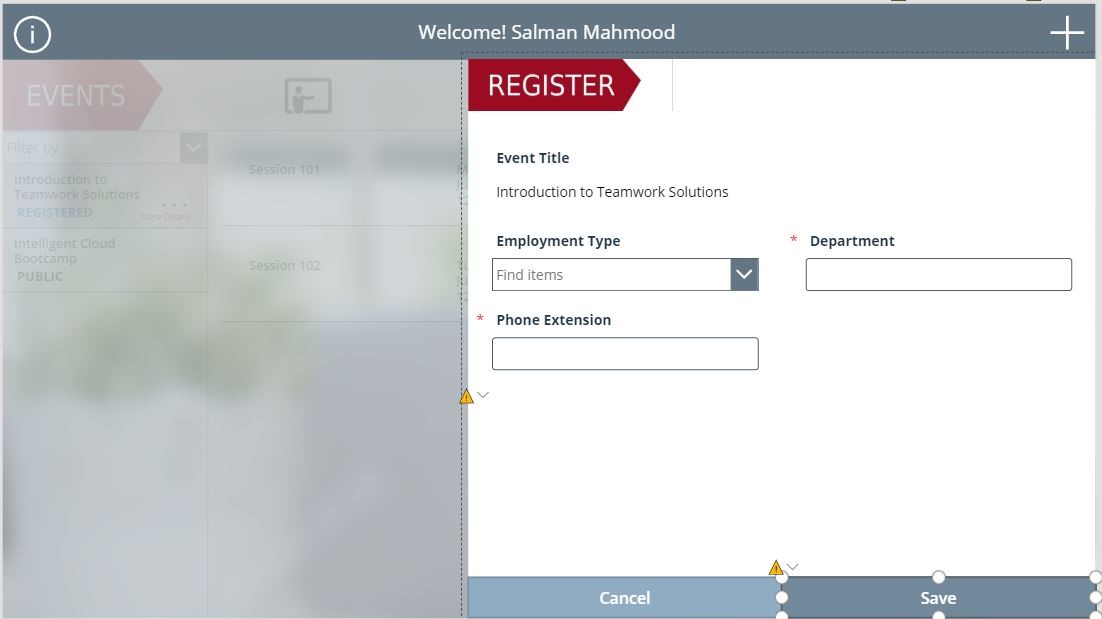
You can also use an Office365 connector to add an Event in the user’s Outlook calendar. Please follow the link below for more information:
https://docs.microsoft.com/en-us/connectors/office365/#create-event-(v2)

Create Unregister Functionality
In order to unregister the event from the user, you can use the Remove function and filter the entry based on the selected Event ID, which will remove the user entry from the Event Registration List.
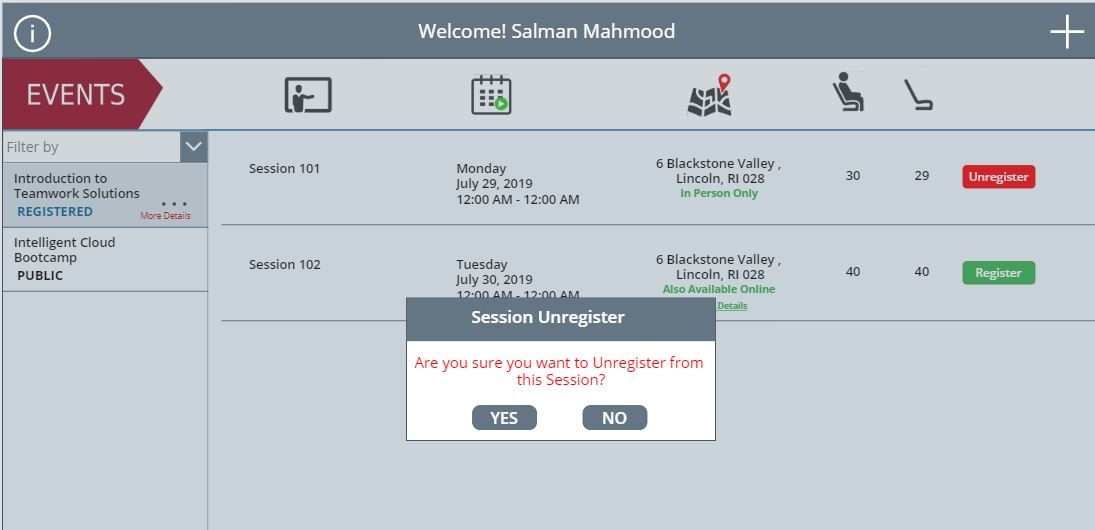
You can also use an Office365 connector to delete the Event from the user’s Outlook calendar. Please follow the link below for more information:
https://docs.microsoft.com/en-us/connectors/office365/#delete-event-(v2)
Create Bulk User Registration Functionality
An admin can register users for an Event. In order to create this functionality, we are using Collections in the PowerApps and then using a Patch Formula to add all the attendees in the Event Registration List.
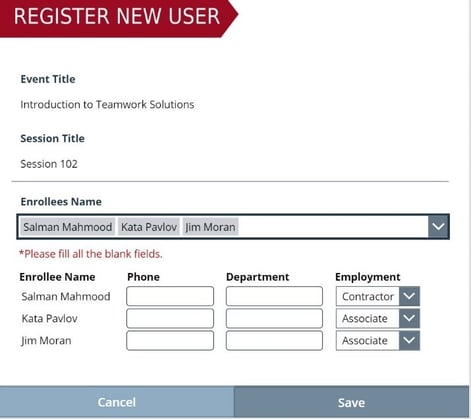
For more information on Collections, you can follow this link: https://docs.microsoft.com/en-us/powerapps/maker/canvas-apps/create-update-collection

Notify Event Admins and Attendees Flow
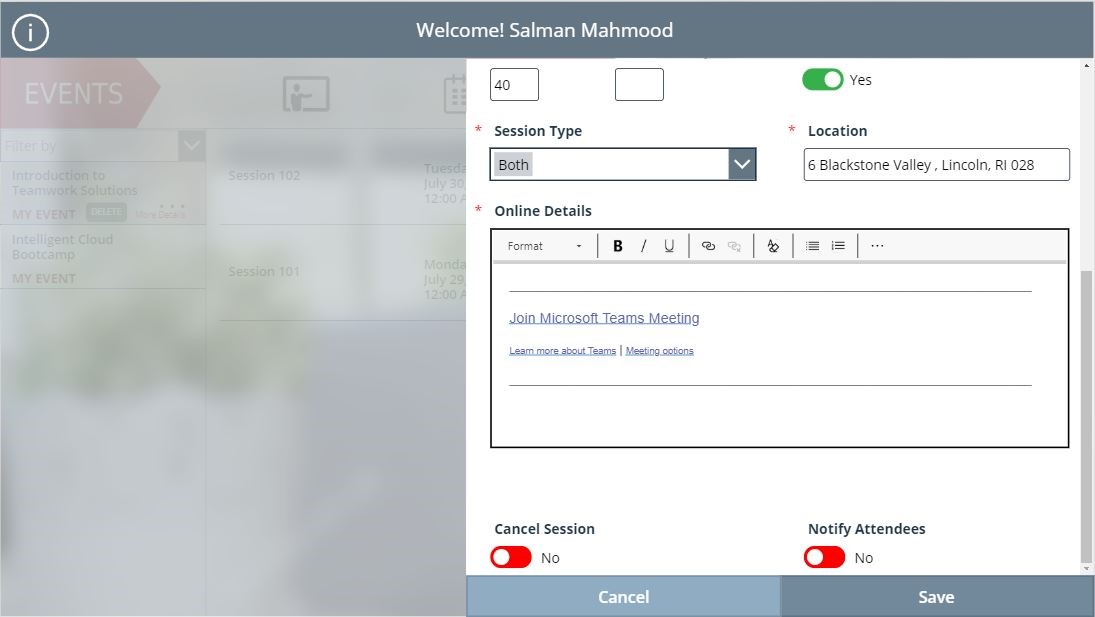
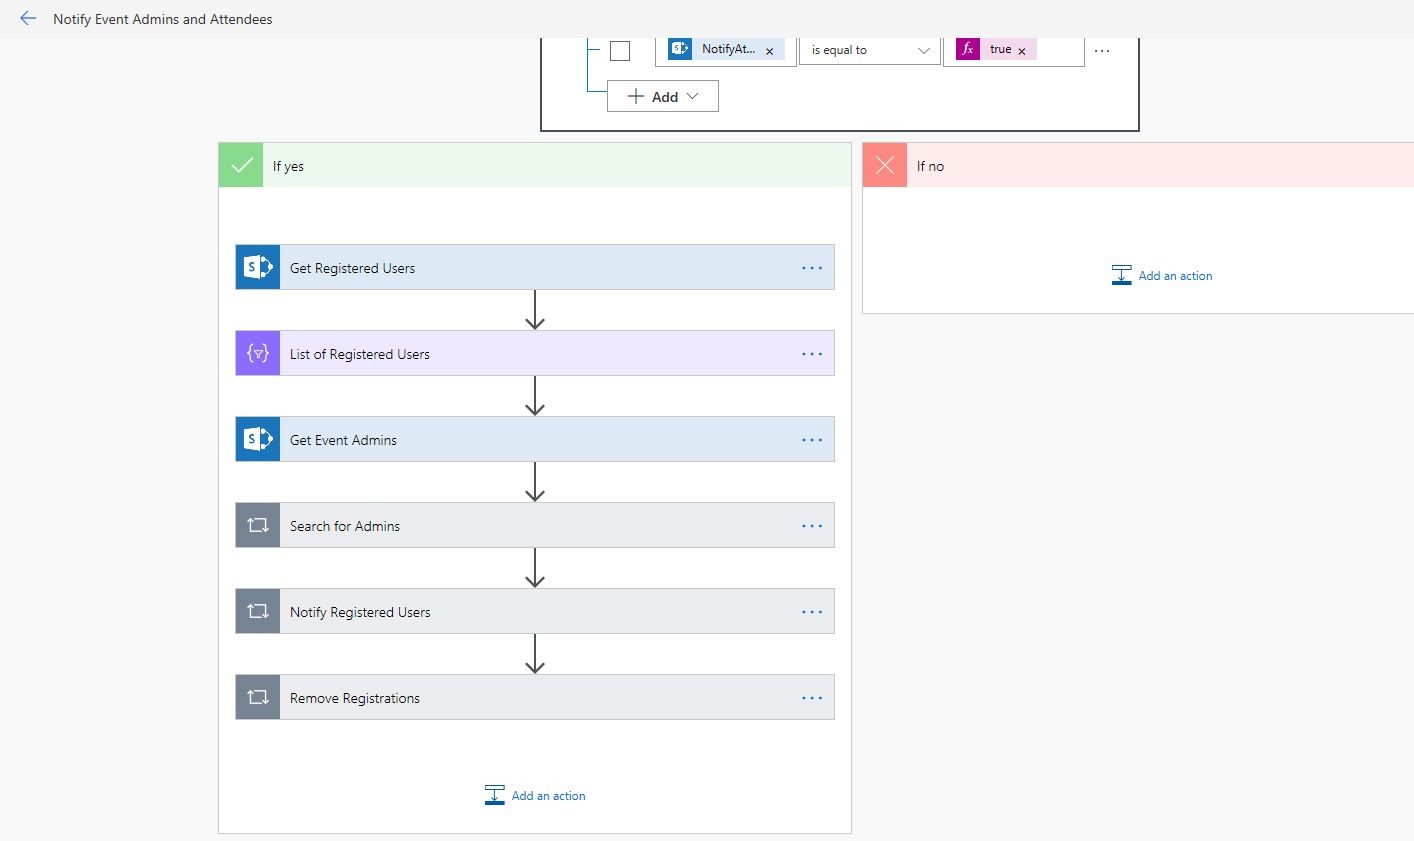
In order to notify attendees regarding the Events updates, you can create MS Flow and run on the Sessions List (trigger on Item-Modified). I’m using two flagged Yes/No fields in the Sessions form that we can use in the MS Flow to check the condition of the Modified Session and send the notification if the flag is set to Yes by the Event administrators.
- In the menu on the left, click My flows.
- If prompted to sign in, sign in by providing the same credentials that you used to sign up.
- Select My flows in the top menu.
- Create a Notify event admins and attendees flow.

Modify Session Information
Notify Attendees and Cancel Session Flags are set as below in the Edit Session form. An admin can modify the session information and set these flags on the selected session to notify the attendees if Session Canceled or Updated Session Information as below.
There are list of actions that I’m using here in the flow. Actions below are to get the list of attendees, list of admins, notify them and remove them if the session is canceled.
The Next Move
As we’ve seen in this blog series, the custom SharePoint list experience, combined with PowerApps, offers users advanced capabilities for discovering and editing list items. With PowerApps, users can easily customize any SharePoint list form. Furthermore, with the power of the Business Application Platform, users can embed apps on a SharePoint page or even create them as standalone web or mobile applications. Most importantly, these apps often require no code, so anyone can build one.
While PowerApps is easy to use by design, there is a lot involved when it comes to making it work best for your enterprise needs. If you have any questions on this guide or want to work with our expert SharePoint and PowerApps practitioners, please reach out to Spyglass. We’re here to help you make the most of your Microsoft environments. Let’s talk.
Case Study: For more information on building events with PowerApps, read our case study: How a Major Retailer Used Office 365 Apps to Schedule Training Events with Ease.

